Component Tests and General Diagnostics
Automatic Light Control System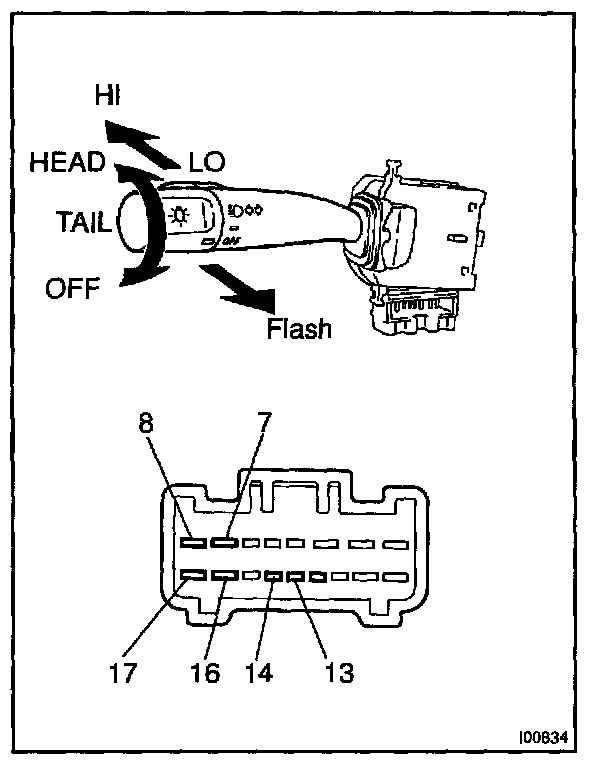

1. INSPECT LIGHT CONTROL SWITCH CONTINUITY
If continuity is not as specified, replace the switch.
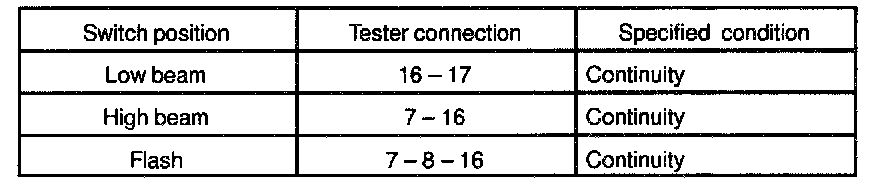
2. INSPECT HEADLIGHT DIMMER SWITCH CONTINUITY
If continuity is not as specified, replace the switch.


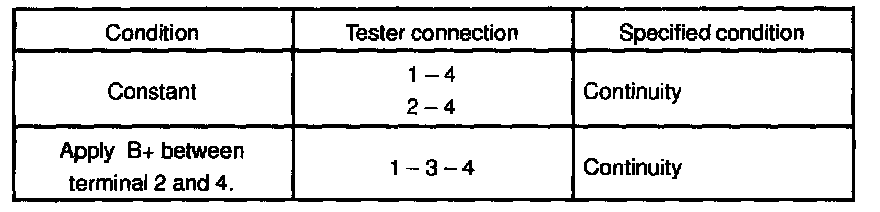
3. INSPECT HEADLIGHT CONTROL RELAY CONTINUITY
If continuity is not as specified, replace the relay.


4. INSPECT TAILLIGHT CONTROL RELAY CONTINUITY
If continuity is not as specified, replace the relay.

5. INSPECT HEADLIGHT DIMMER RELAY CONTINUITY
If continuity is not as specified, replace the relay.

6. CANADA models:
INSPECT DAYTIME RUNNING LIGHT MAIN RELAY CIRCUIT
Disconnect the connector from the relay and inspect the connector on the wire harness side.
If circuit is specified, try replacing the relay with a new one.
If circuit is not as specified, inspect the circuits connected to other parts.

7. USA models:
INSPECT DAYTIME RUNNING LIGHT MAIN RELAY CIRCUIT
Disconnect the connector from the relay and inspect the connector on the wire harness side.
If circuit is specified, try replacing the relay with a new one.
If circuit is not as specified, inspect the circuits connected to other parts.
8. INSPECT DAYTIME RUNNING LIGHT RELAY CONTINUITY
If continuity is not as specified, replace the relay.

9. INSPECT AUTOMATIC LIGHT CONTROL
a. Turn the ignition switch ON.
b. Turn the light control switch to OFF.
c. Parking brake lever released.
d. Gradually cover the top of the sensor.
e. Verify that the lights should turn ON the accessory lights and the headlights.

10. INSPECT AUTOMATIC LIGHT CONTROL
a. Turn the ignition switch ON.
b. Turn the light control switch to OFF.
c. Parking brake lever released.
d. Cover the top of the light sensor.
e. Head and tail lights turn ON.
f. Gradually expose the light sensor.
g. Tail light turn OFF and DRL light turn ON.
11. INSPECT LIGHT-OFF CONDITION
a. Turn the ignition switch ON.
b. Turn the light control switch to OFF.
c. Parking brake lever released.
d. Lights auto ON:
Gradually cover the top of the sensor.
12. INSPECT LIGHTS-ON CONDITION
Turn the ignition switch OFF.
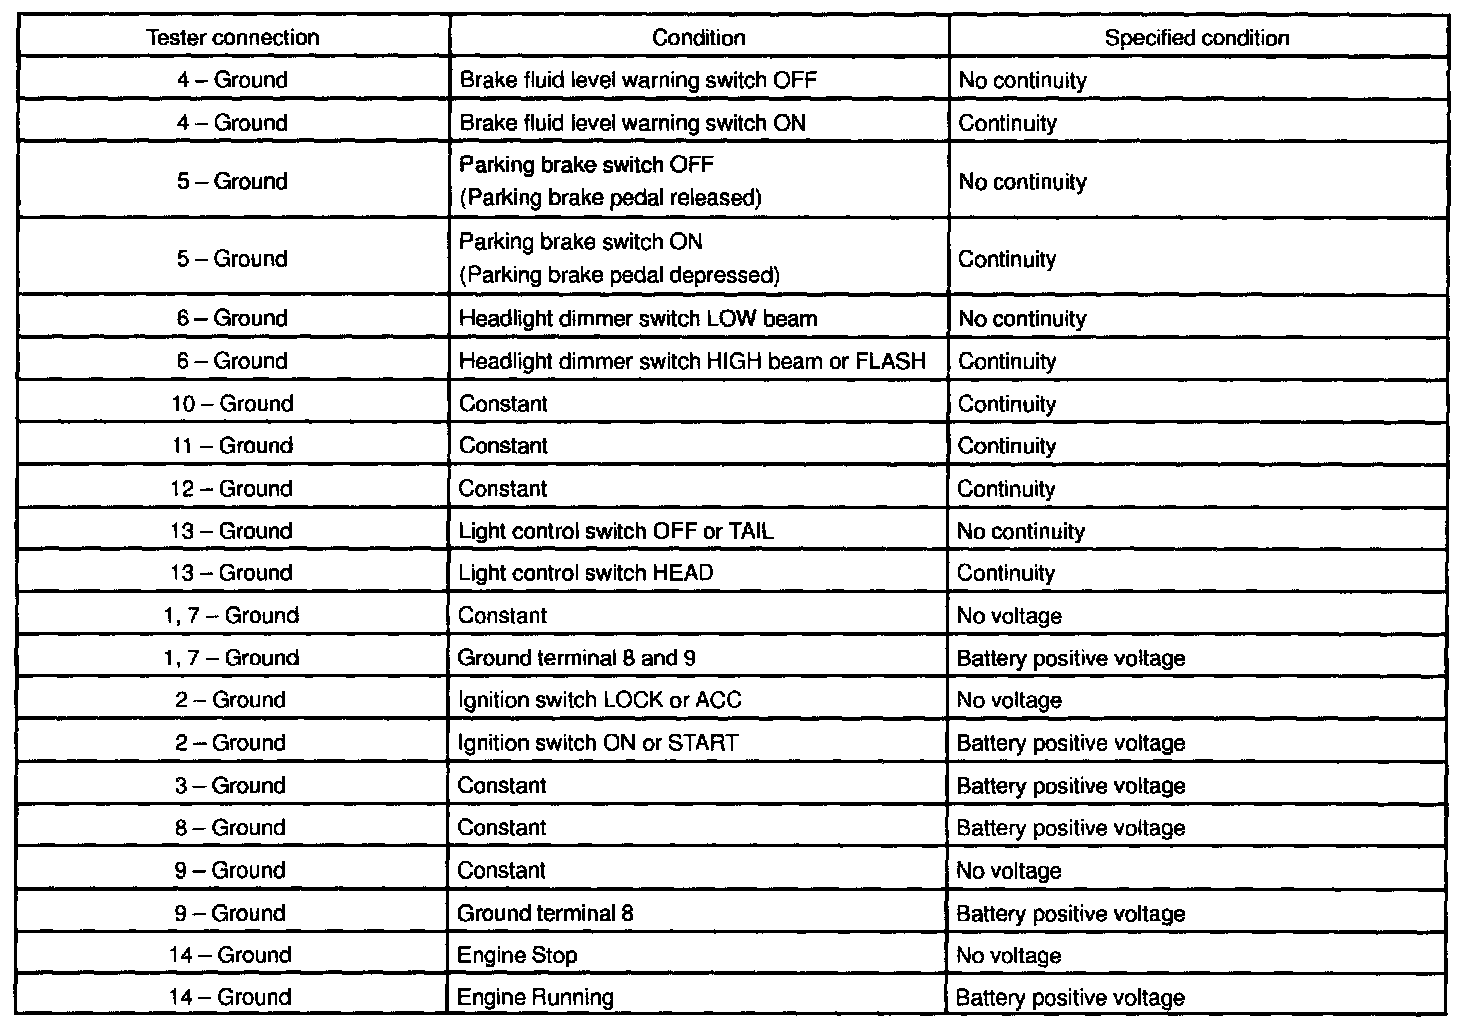
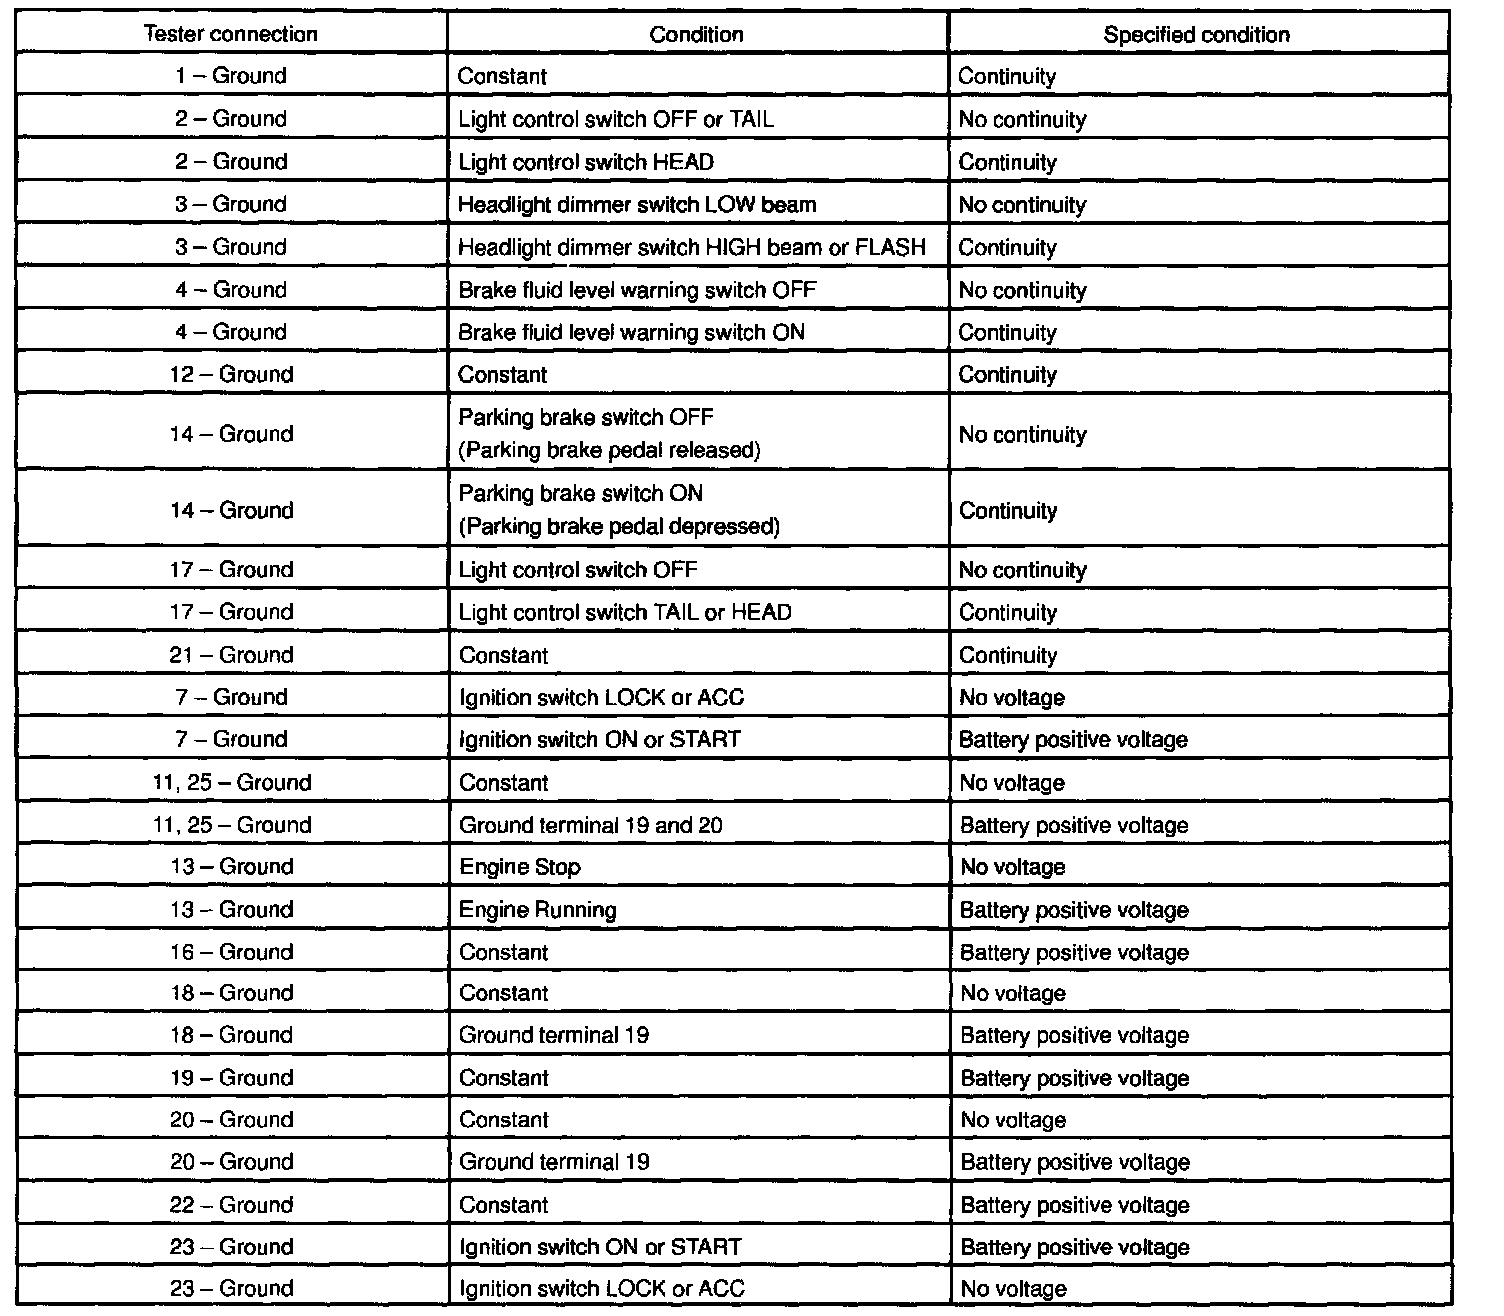
13. INSPECT AUTOMATIC LIGHT CONTROL SENSOR CIRCUIT


a. Disconnect the connector from the sensor and inspect the connector on the wire harness side, as shown in the chart.
If circuit is as specified, perform the inspection on the following.
If the circuit is not as specified, inspect the circuit connected to other parts.


b. Connect the wire harness side connector to the sensor and inspect wire harness side connector from the back side, as shown.
HINT:
- Ignition switch ON.
- Light control switch AUTO.
- Vehicle's surroundings are bright.
If circuit is as specified, try replacing the sensor with a new one.
If the circuit is not as specified, inspect the circuit connected to other parts.
14. INSPECT LIGHT-ON WARNING SYSTEM (INSPECT INTEGRATION RELAY OPERATION)
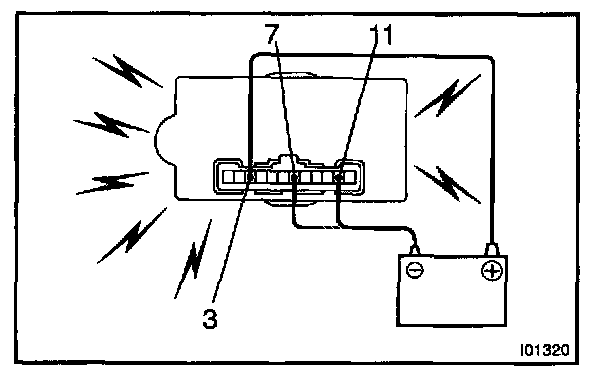
a. Connect the positive (+) lead from the battery to terminal 3.
b. Connect the negative (-) lead from the battery to terminals 7 and 11.
c. Check that the bulb lights and the buzzer sounds for 4 - 8 seconds.
d. Return to step a., and operate the buzzer sound again.
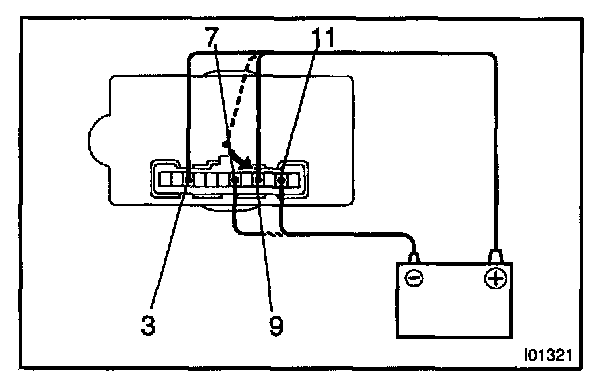
e. Connect the positive (+) lead from the battery to terminal 9.
f. Check that the buzzer stops sounding.
HINT: Check the buzzer sound within a period of 4 to 8 seconds.
If operation is not as specified, replace the relay.
15. INSPECT LIGHT-ON WARNING SYSTEM (INSPECT INTEGRATION RELAY CIRCUIT).