Alternator: Service and Repair
-
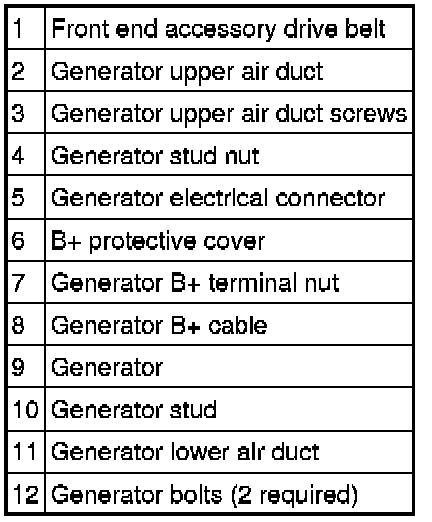
GENERATOR REMOVAL/INSTALLATION - 2.5L
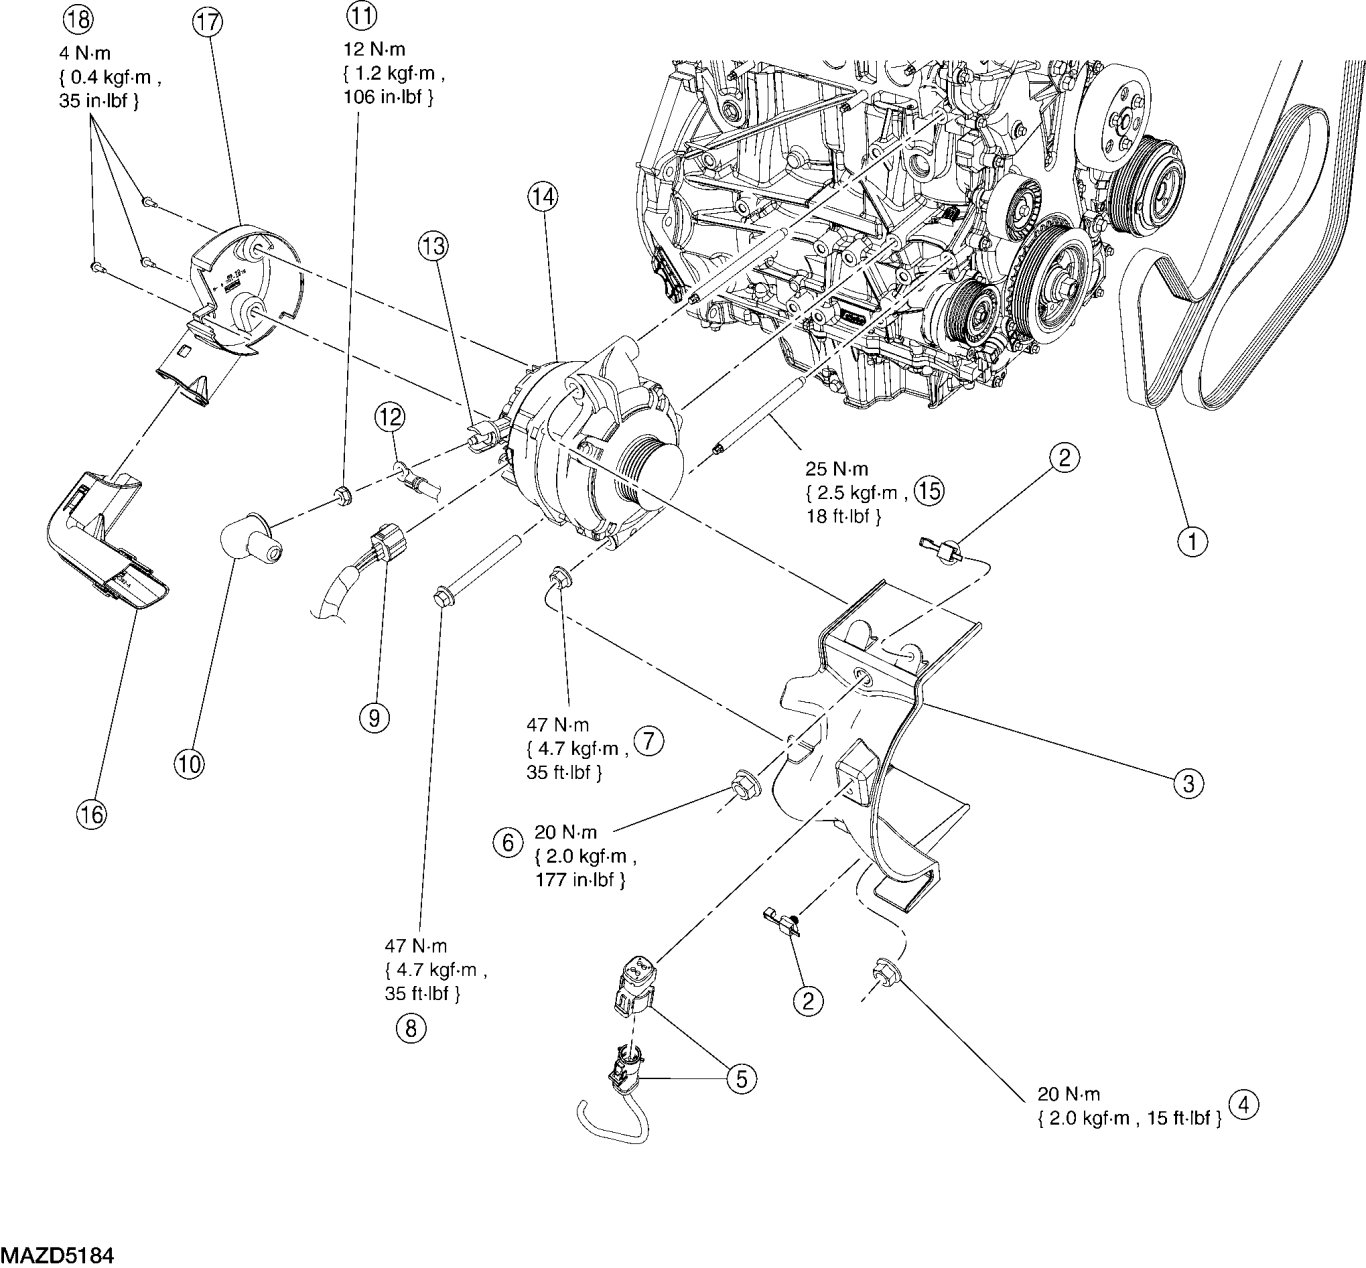
CAUTION:Do not allow any metal object to come in contact with the generator housing and internal diode cooling fins. A short circuit may result and burn out the diodes. Failure to follow this instruction may result in component damage.
1. With the vehicle in NEUTRAL, position it on a hoist. See Lifting.
2. Disconnect the battery. See Battery Disconnect.
3. Remove the 5 bolts, one pushpin and the RH lower splash shield.
- To install, tighten to 8 Nm {0.8 kgf-m, 71 in-lbf}.
4. Rotate the front end accessory drive belt tensioner clockwise and position the accessory drive belt aside.
5. Remove the battery harness locator from the lower generator stud.
6. Remove the generator bolt.
- To install, tighten to 47 Nm {4.7 kgf-m, 35 ft-lbf}.
7. Remove the generator stud nut.
- To install, tighten to 20 Nm {2.0 kgf-m, 177 in-lbf}.
8. Working from the top of the vehicle, press the locking tab to release the generator lower air duct from the generator and remove the lower air duct.
9. Position the generator B+ protective cover aside and remove the generator B+ terminal nut.
- To install, tighten to 12 Nm {1.2 kgf-m, 106 in-lbf}.
10. Position the generator B+ cable aside.
11. Disconnect the generator electrical connector.
12. Remove the generator stud and remove the generator.
- To install, tighten to 25 Nm {2.5 kgf-m, 18 ft-lbf}.
13. Remove the 3 screws and the generator upper air duct.
- To install, tighten to 4 Nm {0.4 kgf-m, 35 in-lbf}.
14. To install, reverse the removal procedure.