Control Unit For Cooling Air Control
Removing and installing control unit for coolant control
Preliminary work
Notice
Voltage peaks
^ Risk of damage to loads or to the control unit
-> Before disconnecting or removing an electrical load, remove the ignition key and switch off the load.
Information
Specifications for wrench sizes (a/f specifications) for screw heads are described as follows:
^ Torx screws: (E..) for external Torx, (T..) for internal Torx.
^ Hexagon-head bolts (internal and external hexagon): Wrench size (a/f)
1. Remove front right wheel housing liner.
Removing control unit for coolant control
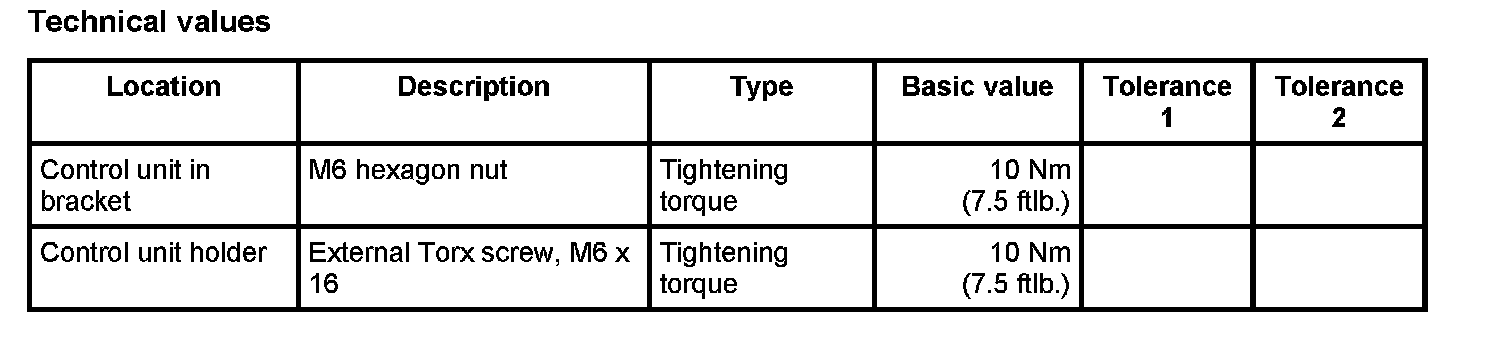
1. Remove control unit -1-.
Control unit for coolant control
1.1. Release cable plug -3- on the control unit -arrow- and pull it off.
Connector for control unit for coolant control
Release:
Releasing cable plug on control unit for coolant control
1.2. Release and unclip remaining plug connections -2, 4 and 5- if necessary.
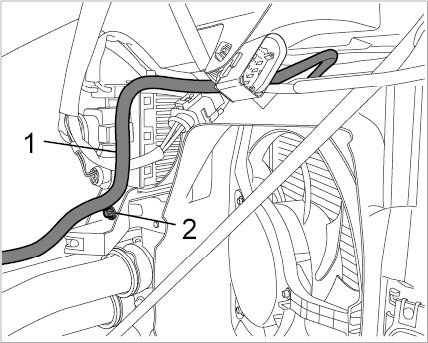
1.3. Unclip breather hose -1- for radiator from the radiator bracket holder.
1.4. Unscrew external Torx screw (E10, M6 x 16) -2-.

Retaining screw for control unit
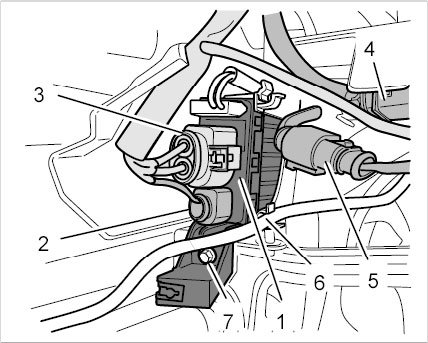
1.5. Pull control unit out of the guide -arrow-.

Locking lug for control unit
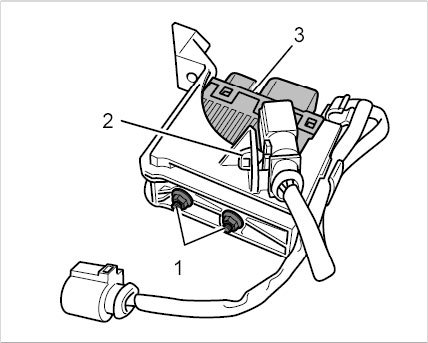
2. Unscrew two M6 hexagon nuts (a/f 10) -1-.
2.1. Unclip cable -2-.
2.2. Pull the control unit -3- out of the bracket.

Control unit for coolant control removed
Installing control unit for coolant control
1. Fit control unit -3- into the bracket.
Control unit for coolant control removed
1.1. Clip in cable -2-.
1.2. Screw in and tighten two M6 hexagon nuts (a/f 10) -1-.
-> Tightening torque: 10 Nm (7.5 ftlb.)
2. Install control unit.
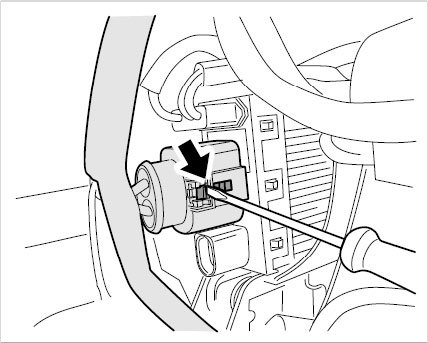
2.1. Slide control unit and bracket into the guide -arrow-.

Locking lug for control unit
2.2. Fit and tighten external Torx screw (E10, M6 x 16) -2-.
-> Tightening torque: 10 Nm (7.5 ftlb.)
Retaining screw for control unit
2.3. Clip in breather hose -1- for radiator on the radiator bracket holder.
2.4. Clip in and connect cable plugs -2 to 5-.

Control unit for coolant control
2.5. Secure the cable at the clips provided.
Subsequent work
1. Install front right wheel housing liner.